|
|
Joined: Sep 2000
Posts: 22,096
Lifer
|
|
Lifer
Joined: Sep 2000
Posts: 22,096 |
Wisdom is knowing what's enough
|
|
|
|
|
Joined: Apr 2011
Posts: 55
Junior Member
|
|
Junior Member
Joined: Apr 2011
Posts: 55 |
And another mod - making the optional flight stick mount fit the Thrustmaster Warthog perfectly. All you need is a cutting disc and a metal file. You can spraypaint the cut edges afterwards if you want, but the silver line along the edge goes well with the overall look of the warthog stick. Once you've mounted the stick, the only thing you have to look out for is not crushing your balls when sitting down and sliding the seat forward to reach the pedals.  See pics below. Before (excuse the coffee spills, was previously using this as a cup holder): 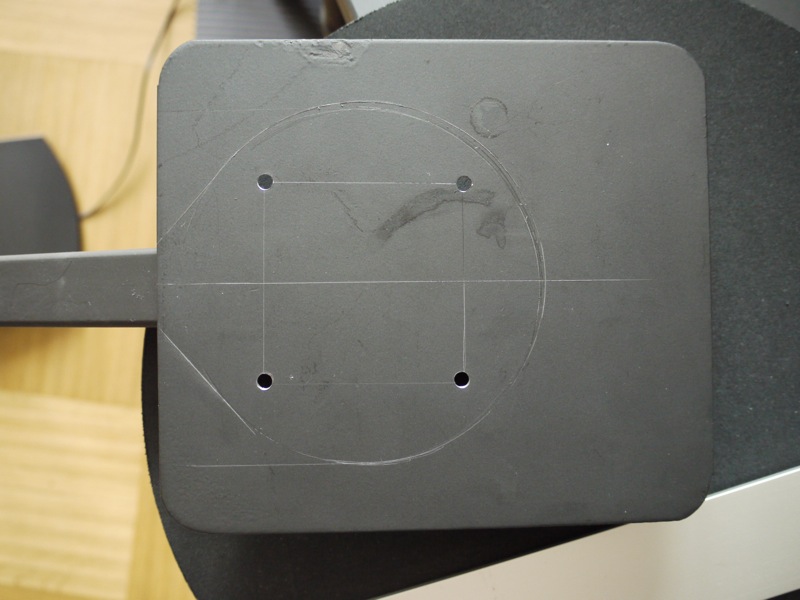 After: 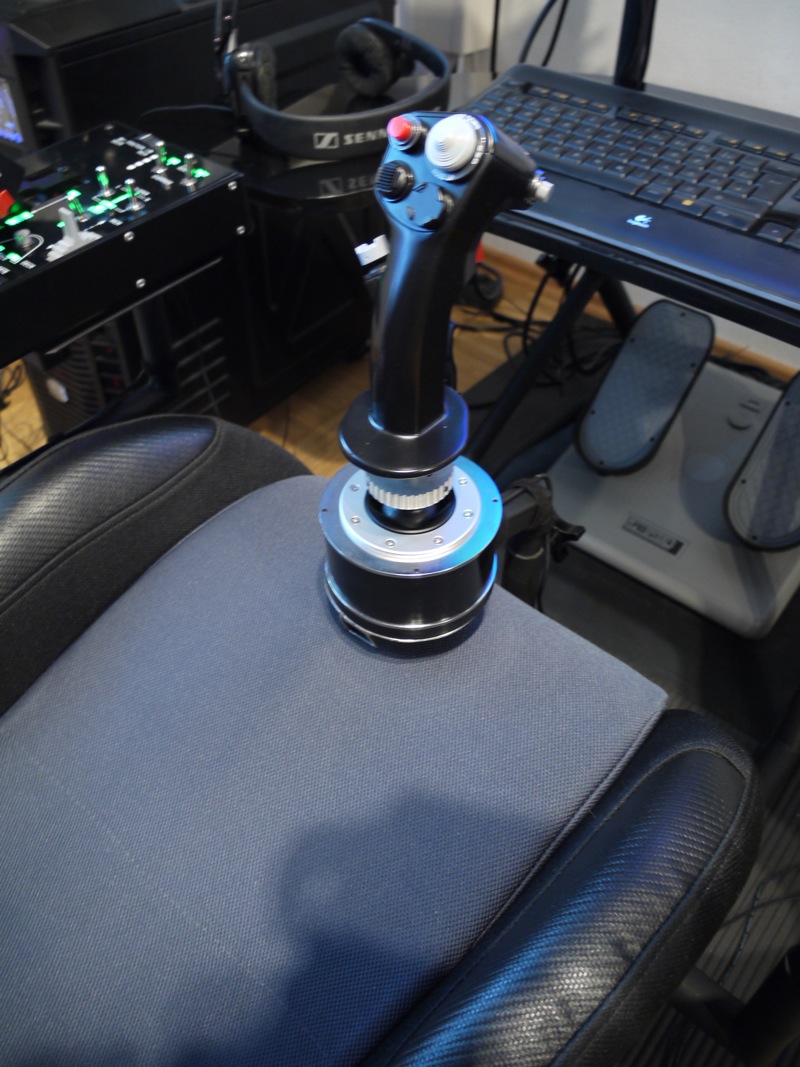 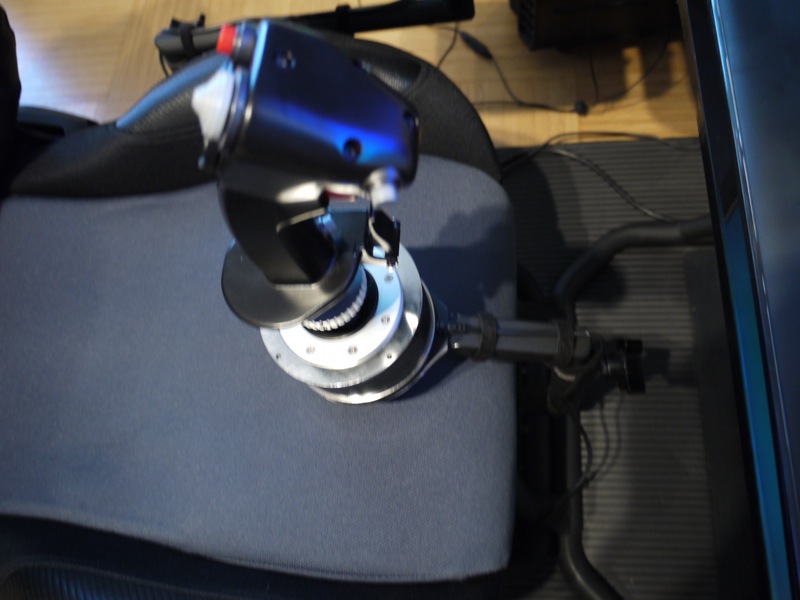 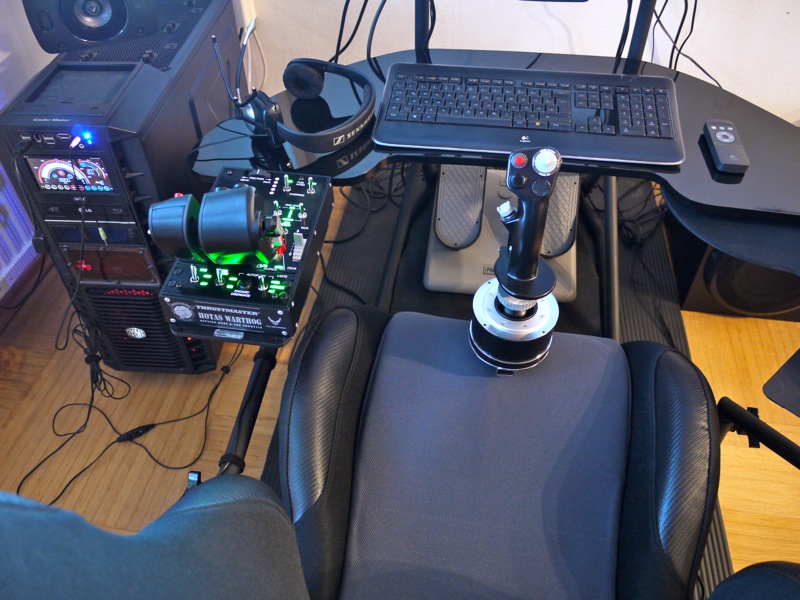 As before, exact measurements available on request.
Last edited by mhe_at; 07/30/11 05:33 PM.
You don't stop playing because you grow old, you grow old because you stop playing.
|
|
|
|
|
Joined: Sep 2000
Posts: 22,096
Lifer
|
|
Lifer
Joined: Sep 2000
Posts: 22,096 |
Wisdom is knowing what's enough
|
|
|
|
|
Joined: Jul 2002
Posts: 10,343
Veteran
|
|
Veteran
Joined: Jul 2002
Posts: 10,343 |
You're only young once, but you can be immature forever.
|
|
|
|
|
Joined: Sep 2002
Posts: 11,274
USMC Veteran
|
|
USMC Veteran
Joined: Sep 2002
Posts: 11,274 |
America will never be destroyed from the outside. If we falter and lose our freedoms, it will be because we destroyed ourselves.
|
|
|
|
|
Joined: Sep 2010
Posts: 957
For Whom the Bell Tolls Member
|
|
For Whom the Bell Tolls Member
Joined: Sep 2010
Posts: 957 |
Hi mhe_at
I am about to unbox my Warthog and work on mounting it to my Obutto. Can you supply those screw measurements for the stick mount? What size drill bit did you use?
Also, how did you go about mounting the throttle quadrant on the side? I currently use heavy duty velcro. Seems like most Obutto/Warthog users have gone this route.
Thanks
Chaz
Last edited by Chaz; 09/13/11 02:57 AM.
|
|
|
|
|
Joined: Jan 2011
Posts: 98
Junior Member
|
|
Junior Member
Joined: Jan 2011
Posts: 98 |
|
|
|
|
|
Joined: Apr 2011
Posts: 55
Junior Member
|
|
Junior Member
Joined: Apr 2011
Posts: 55 |
Chaz, as stated in the private message to you, the drill bits are 4.5mm in diameter and the holes are tapered on the underside of the plate. Hole positions are completely square with an edge length of 60.1mm center to center of the holes. The throttle is mounted using Tesa industrial strength velcro strips. The drilling templates for both the throttle and the stick can be downloaded as a PDF from Thrustmaster's support page: click me!In other news: I added a touchscreen to my setup. To achieve this setup, I had to get the acrylic plate moving. This was obviously not possible with the plate velcro'd to the metallic baseplate. So i removed the tape and replaced it with rubber feet fixed to the baseplate. The acrylic plate just lies on top of it and since the friction between the rubber feet and the acrylic plate is really high, it does not move at all. I simply lift it little and can move it around, once I let go it stays in place. So I have the perfect alignment when set up for classic FPS or something and can reconfigure for flightsimming in a matter of minutes. When unused, the touchscreen stands on the floor at the wall on the left. Pictures: 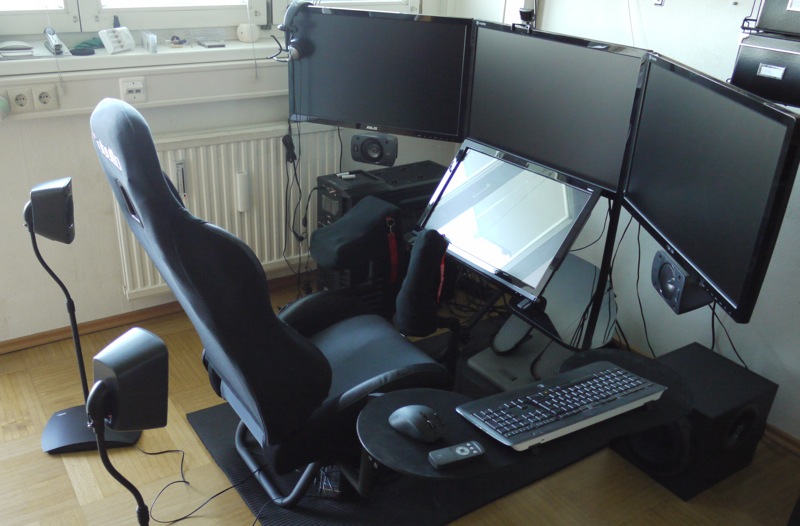 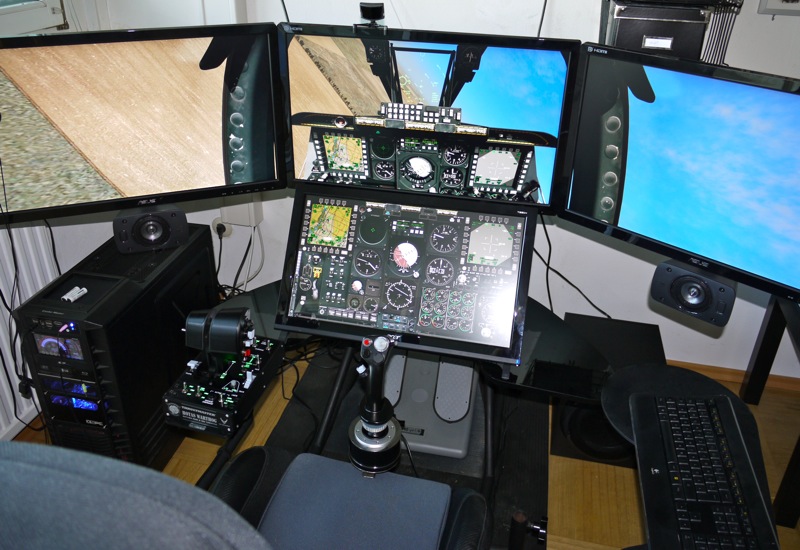 In progress: Fixing an Ergotron LX arm onto the vertical posts of the Obutto and mount the touchscreen on it, so I can just swivel it out of the way when not used. Will make switching between allround and sim use much less tedious. Might take a while though, I'm pretty busy at the moment.
Last edited by mhe_at; 09/22/11 01:18 PM.
You don't stop playing because you grow old, you grow old because you stop playing.
|
|
|
|
|
Joined: Sep 2011
Posts: 1
Junior Member
|
|
Junior Member
Joined: Sep 2011
Posts: 1 |
mhe_at, I'm planning on doing a build like yours probably early next year. I was wondering how you got all the monitors setup. I know a GTX 590 can support 3 displays, do you run SLI with 2 cards to get the touchscreen display working?
|
|
|
|
|
Joined: Apr 2011
Posts: 55
Junior Member
|
|
Junior Member
Joined: Apr 2011
Posts: 55 |
As far as I know a build like this would be very hard to do using nVidia cards. nVidias in surround have the bad habit of disabling remaining displays that don't belong to the surround group - hence locking out the 4th screen. I run this thing off a single 6970 2GB modded with a more efficient cooler and it works pretty well. I don't know of anybody running a setup like mine on nVidia GPUs, so I slightly doubt it's possible. The only thing I could think of is making a 4-screen surround group and locking the 3D output of DCS A10C to the upper screens using a viewport in the graphics config.
Your mileage may vary, but from in experience Eyefinity is much more flexible than surround. My rig would possibly benefit greatly from a Crossfire setup though, but I'll wait until the southern islands chip series comes out before thinking about adding another GPU. The support for crossfire in windowed mode is another story though...
You don't stop playing because you grow old, you grow old because you stop playing.
|
|
|
|
|
Joined: May 2002
Posts: 15,158
Veteran
|
|
Veteran
Joined: May 2002
Posts: 15,158 |
About to order this, but notice that Main PC is out of the Flight stick/Throttle mount accessory. Is this add on necessary in order to use both a throttle and stick? I'd like the stick on the right and the throttle on the left.
Mobo ASUS MAXIMUS IV EXTREME (REV 3.0)
Memory CORSAIR XMS3 8GB DDR3
GPU 2 EVGA 680 FTW 4GB
CPU Intel Core i7-2600K Sandy Bridge 3.4GHz (3.8GHz)
Drives 2 HITACHI Deskstar 3TB 2 Crucial 256 GB SSD Displays 3 HP ZR30w 30" monitors
UPS Cyberpower PP2200SW
PSU Antec High Current Pro HCP-1200 1200W
Case COOLER MASTER CM Storm Trooper
Drive LITE-ON Black 12X Blu-ray
CPU cooler Noctua 6 Dual Heatpipe
Fans COOLER MASTER SickleFlow 120
OS Windows 7 Premium
|
|
|
|
|
Joined: Sep 2002
Posts: 11,274
USMC Veteran
|
|
USMC Veteran
Joined: Sep 2002
Posts: 11,274 |
Unless you can make your own, I'd say they are necessary.
America will never be destroyed from the outside. If we falter and lose our freedoms, it will be because we destroyed ourselves.
|
|
|
|
|
Joined: May 2002
Posts: 15,158
Veteran
|
|
Veteran
Joined: May 2002
Posts: 15,158 |
Arrived today. Woot!
Last edited by peppergomez; 10/25/11 02:38 AM.
Mobo ASUS MAXIMUS IV EXTREME (REV 3.0)
Memory CORSAIR XMS3 8GB DDR3
GPU 2 EVGA 680 FTW 4GB
CPU Intel Core i7-2600K Sandy Bridge 3.4GHz (3.8GHz)
Drives 2 HITACHI Deskstar 3TB 2 Crucial 256 GB SSD Displays 3 HP ZR30w 30" monitors
UPS Cyberpower PP2200SW
PSU Antec High Current Pro HCP-1200 1200W
Case COOLER MASTER CM Storm Trooper
Drive LITE-ON Black 12X Blu-ray
CPU cooler Noctua 6 Dual Heatpipe
Fans COOLER MASTER SickleFlow 120
OS Windows 7 Premium
|
|
|
|
|
Joined: May 2002
Posts: 15,158
Veteran
|
|
Veteran
Joined: May 2002
Posts: 15,158 |
I notice everyone seems to be mounting the keyboard tray on the righr, and wonder whqt the reasonfor that is. I hqve set mostof obutto up, but the flight stick mount is out of stock at main pc right now, so i dont yet have that component. I was thinking of setting it up as follows: keyboard tray on left, throttle on left, and joystick on right. I dont plan on using a center mounted joystick because i would like to be able to use the joystick and keyboard and mouse for games like BF3, so hqving the keyboard tray on left and joystick on right seems a better solution. No need to remove stick.
Anyone know if this is possible? I am hoping that the keyvoard tray will be high enough above the throttle that i can just rotate the tray in towards me and It will clear the throttle, and have the joystick on the right for games like bf3.
What do you folks do?
PS do you guys with the acrylic tabletop who dont use a yoke or steering wheel attach the tabletop to the steering wheel mount with velcro like in option 1 or do you hardmount it by drilling holes and attaching with bolts, as in option 2? I wont be attaching a yoke or steering wheel, and wonde if e qcrylic tqbletop will be securee enough with just velcro. I am hoping velcro is suffiecient because i dont want to mar the surface of the acrylic table by drilling bolts into it.
(ugh i ha typing on an ipad....sorry for the wretched spelling)
Last edited by peppergomez; 10/29/11 07:35 PM.
Mobo ASUS MAXIMUS IV EXTREME (REV 3.0)
Memory CORSAIR XMS3 8GB DDR3
GPU 2 EVGA 680 FTW 4GB
CPU Intel Core i7-2600K Sandy Bridge 3.4GHz (3.8GHz)
Drives 2 HITACHI Deskstar 3TB 2 Crucial 256 GB SSD Displays 3 HP ZR30w 30" monitors
UPS Cyberpower PP2200SW
PSU Antec High Current Pro HCP-1200 1200W
Case COOLER MASTER CM Storm Trooper
Drive LITE-ON Black 12X Blu-ray
CPU cooler Noctua 6 Dual Heatpipe
Fans COOLER MASTER SickleFlow 120
OS Windows 7 Premium
|
|
|
|
|
Joined: Sep 2000
Posts: 22,096
Lifer
|
|
Lifer
Joined: Sep 2000
Posts: 22,096 |
I'm not even mounting my cordless keyboard with the current config. If you don't use a steering wheel, industrial strength velcro (yes, there is such as thing) works fine to hold down the acrylic tabletop. I drilled my tabletop to attach because the G27 is attached as much as the CH HOTAS. I'm not using the metal keyboard tray at all right now.  I would like to create brackets so I can switch between setups, but considering I'm 10 months behind doing the followup article on the Obutto...   Ken King has a nice solution for flight only users. Here he is shown in his flight suit ready for battle. 
Wisdom is knowing what's enough
|
|
|
|
|
Joined: Apr 2011
Posts: 55
Junior Member
|
|
Junior Member
Joined: Apr 2011
Posts: 55 |
Pepper, I know exactly what you mean - it is quite an act to get a system perfect for both flight sims and games like BF3. Your idea of not using a center stick because it would interfere with the keyboard tray is rather pointless because the keyboard tray is so wide that it will also interfere with sidestick configurations if you use the flight sim mount. Therefore I use the following setup: 1.) Center stick on the flight stick mount. Simply unscrew and lay it on the floor when not used. 2.) Throttle on the left. It swings to the back when not used. Mounted on the Obutto's gearshift mount. 3.) Keyboard tray on the right - simply put it parallel to the longitudinal axis of the pit when simming and swivel it towards you when working or playing games 4.) The acrylic table has a high friction coefficient against rubber, so I don't have it mounted. I put some self-adhesive rubber pads on the small metallic table and the acrylic tabletop simply lies on top of these rubber pads and is unable to move because of its own weight, much like many glass tables out there. 5.) Most steering wheels and all the tabletop yokes I know have rubber feet on their bottoms, so you simply put them on top of the acrylic table and optionally use a clamp when necessary, simply clamping the acrylic tabletop right in between. Rock solid. In other news, I finished my touchscreen mounting project today. I use Helios for DCS a lot but the touchscreen on top of the acrylic tabletop had to be tilted way back so it doesn't block the lower portion of the center main screen. I had to find a solution for the touchscreen because the viewing angle on the TN panel of the touchscreen was really bad in terms of readability. The solution was to mount an Ergotron LX monitor arm to the pit. I used the model originally designed for wall mounting. The wooden plate is simply spraypainted black, drilled and mounted to the vertical pipes of the screen mount using 26mm steel cable clamps. Guy in the home depot asked me if I wanted to build a ski lift or something, but when I told him I'm gonna use them for my computer, he would shake his head in utter disbelief. Closeup of the mounts: 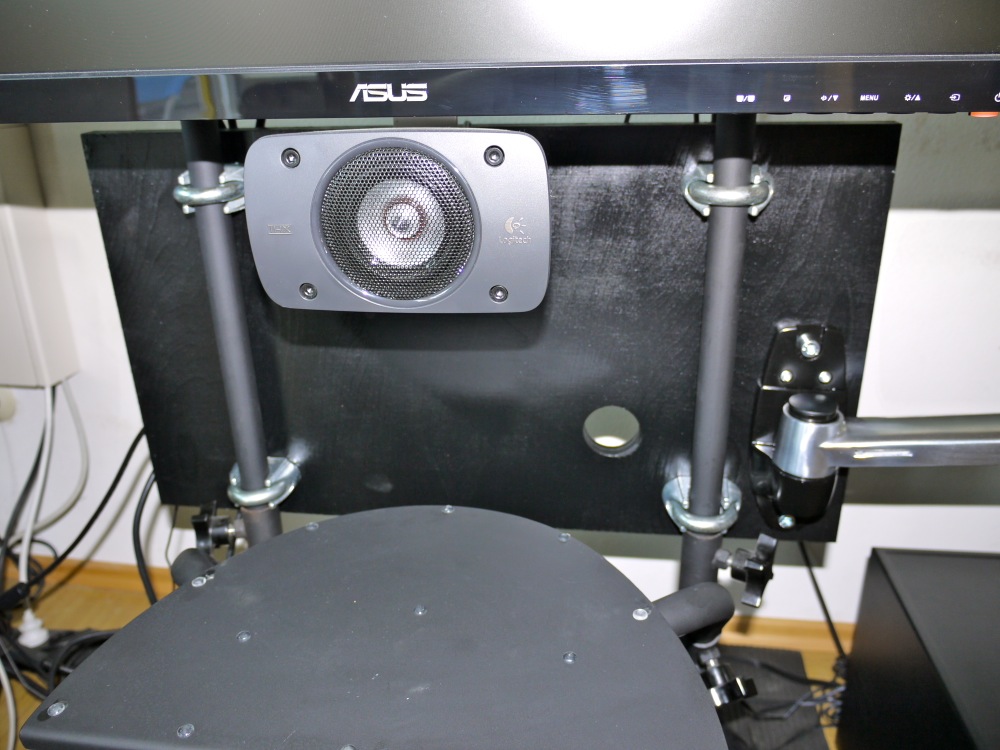 The hole is for routing cables later on 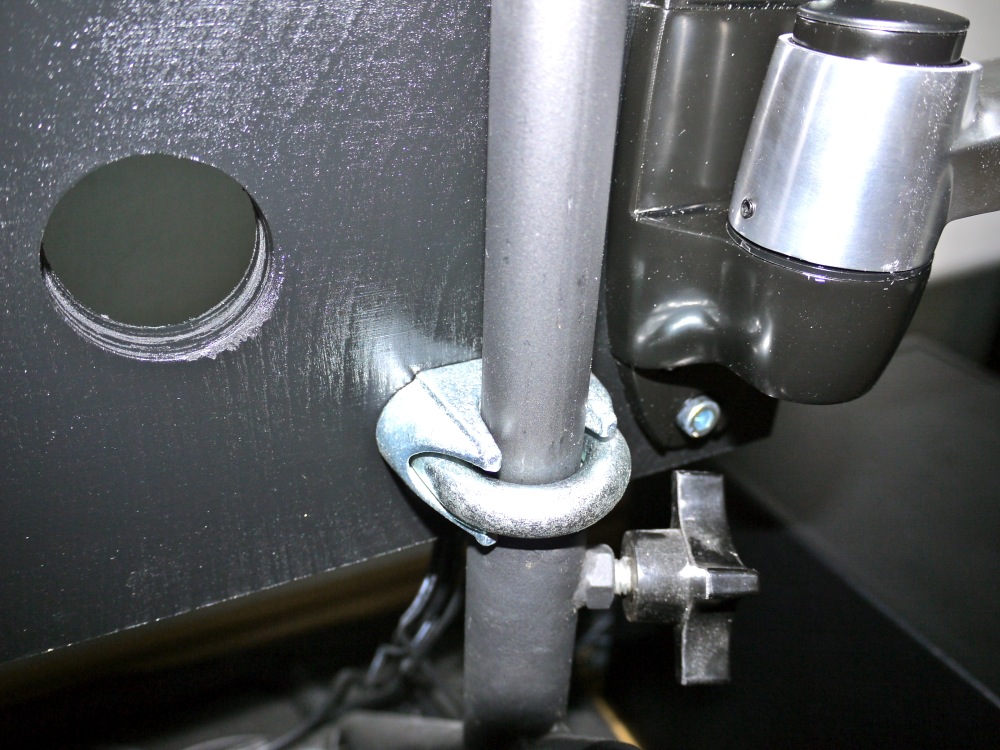 Rear view of the wooden plate. I theoretically put some small metallic plates over the steel clamp screws and use the space in between for cable routing if I were so inclined. 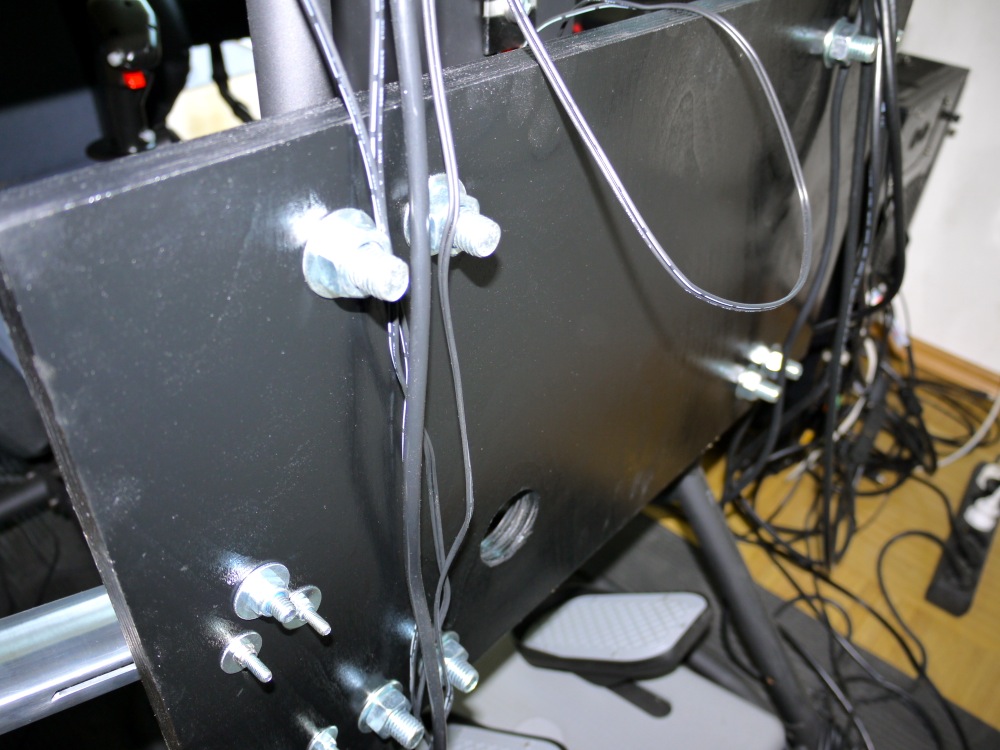 Sim mode 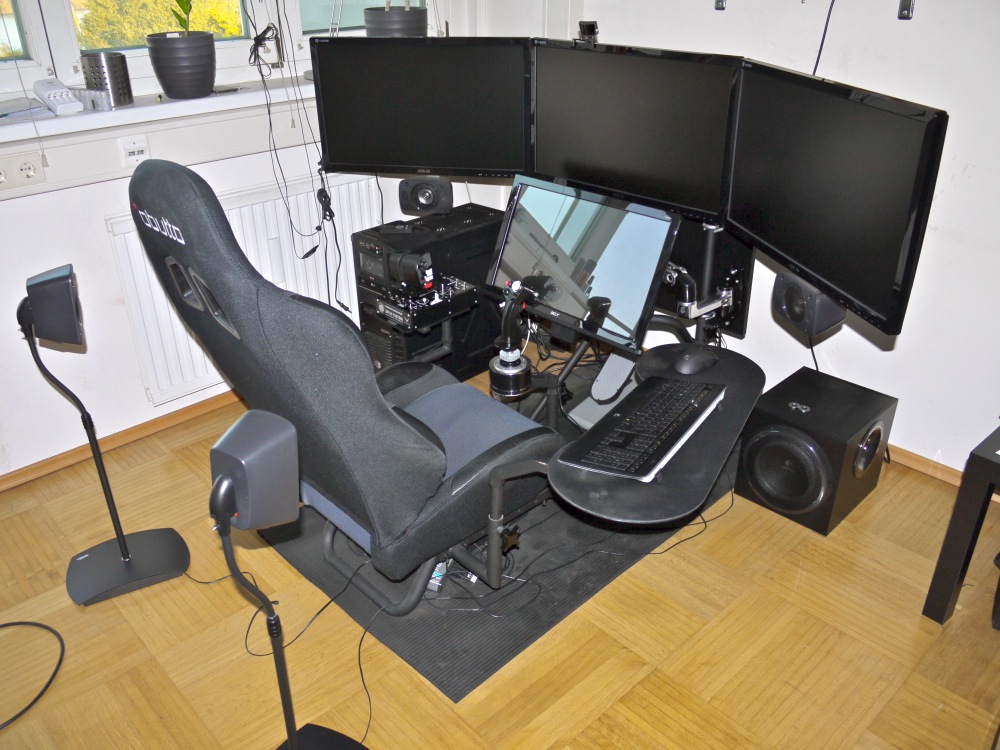 Work- and gaming mode 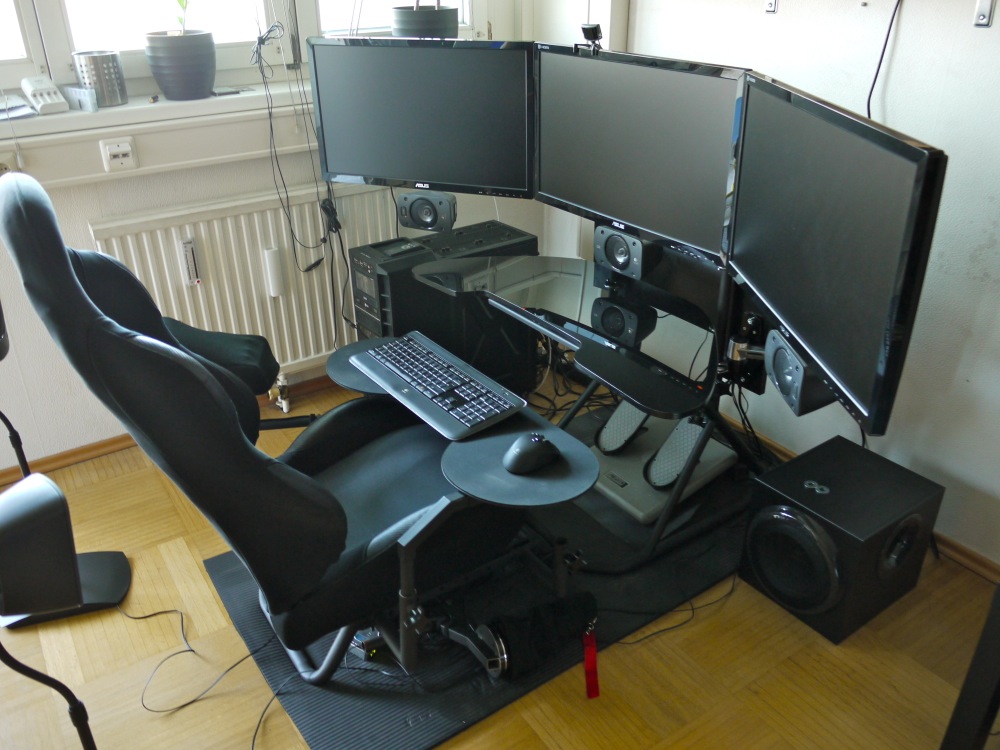 When not in use, the touchscreen folds to the rear of the pit and simply hangs there. 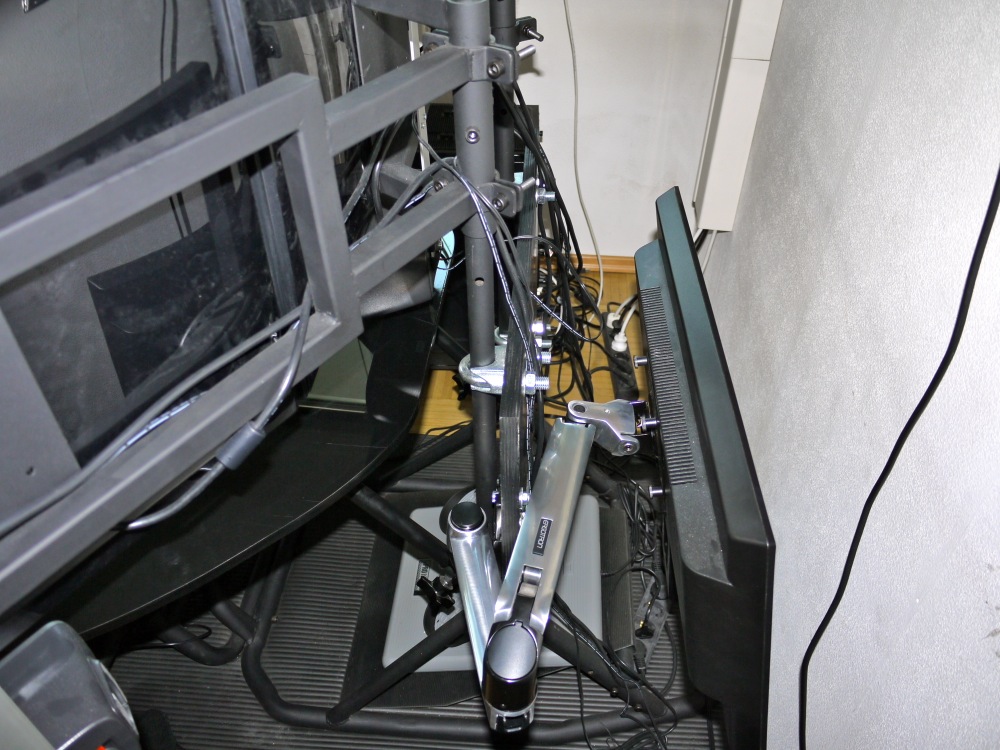 Next time I'm gonna put in a ButtKicker
You don't stop playing because you grow old, you grow old because you stop playing.
|
|
|
|
|
Joined: Sep 2000
Posts: 22,096
Lifer
|
|
Lifer
Joined: Sep 2000
Posts: 22,096 |
Wisdom is knowing what's enough
|
|
|
|
|
Joined: Jul 2005
Posts: 4,328
Senior Member
|
|
Senior Member
Joined: Jul 2005
Posts: 4,328 |
Good bye desk and nearly broken office chair.  
Virtual Thunderbirds, LLC | Sponsored by ThrustmasterASUS ROG MAXIMUS VIII HERO, i7 6700k, G.SKILL Ripjaws V Series 32GB, 980TI 6GB G1 OC, Obutto oZone, Thrustmaster HOTAS Warthog, CH Pro Pedals, NP TrackIR5, ***Soon*** Oculus Rift
|
|
|
|
|
Joined: Sep 2000
Posts: 22,096
Lifer
|
|
Lifer
Joined: Sep 2000
Posts: 22,096 |
Good bye desk and nearly broken office chair. Really? Joining the club, huh? Cool!
Wisdom is knowing what's enough
|
|
|
|
|
Joined: Apr 2010
Posts: 22
Junior Member
|
|
Junior Member
Joined: Apr 2010
Posts: 22 |
Good bye desk and nearly broken office chair. I am in the same boat. Really close to placing myself an order. Seems prices have gone up since the last time I looked at them. Anyone seen them on sale as of late or know of any promo codes out there to be had?
|
|
|
|
|
|
|
J-B Weld
by Terl9999 - 10/02/26 11:54 PM
|
|
|
|
|
|
|
|
|
|
|
|
|
|
|
|
|
|